As you start your interstellar journey through the Settled Systems in Starfield, you will quickly realise that armour isn’t just about aesthetics—it’s vital for survival. Whether you’re facing off against hostile aliens or exploring the harsh environments of distant planets, having the right armour can make all the difference.
In this guide, we’ll delve deep into the mechanics of armour in Starfield, how to upgrade it and what you need to consider as you level up your primary character.
So, how do you upgrade armour in Starfield? Let’s find out!👇
How To Upgrade Armour In Starfield? (Step By Step Guide)
Unlike most open-world action RPGs, upgrading armour in Starfield requires you to focus on multiple pieces; rather than just one complete armour set. Plus, you’re going to need to collect the right materials and research the mods prior to upgrading certain armour types. This will involve a lot of exploring.
To upgrade armour in Starfield, follow these 7 simple steps:
- Step 1: Identify Your Armour Type
- Step 2: Access The Right Workbench
- Step 3: Choose Your Armour Piece
- Step 4: Select The Mod Slot
- Step 5: Pick Your Modification
- Step 6: Craft Your Modification
- Step 7: Allocate Skill Points (Higher Tier Upgrades)
Scroll down for a detailed description on each step in the process.
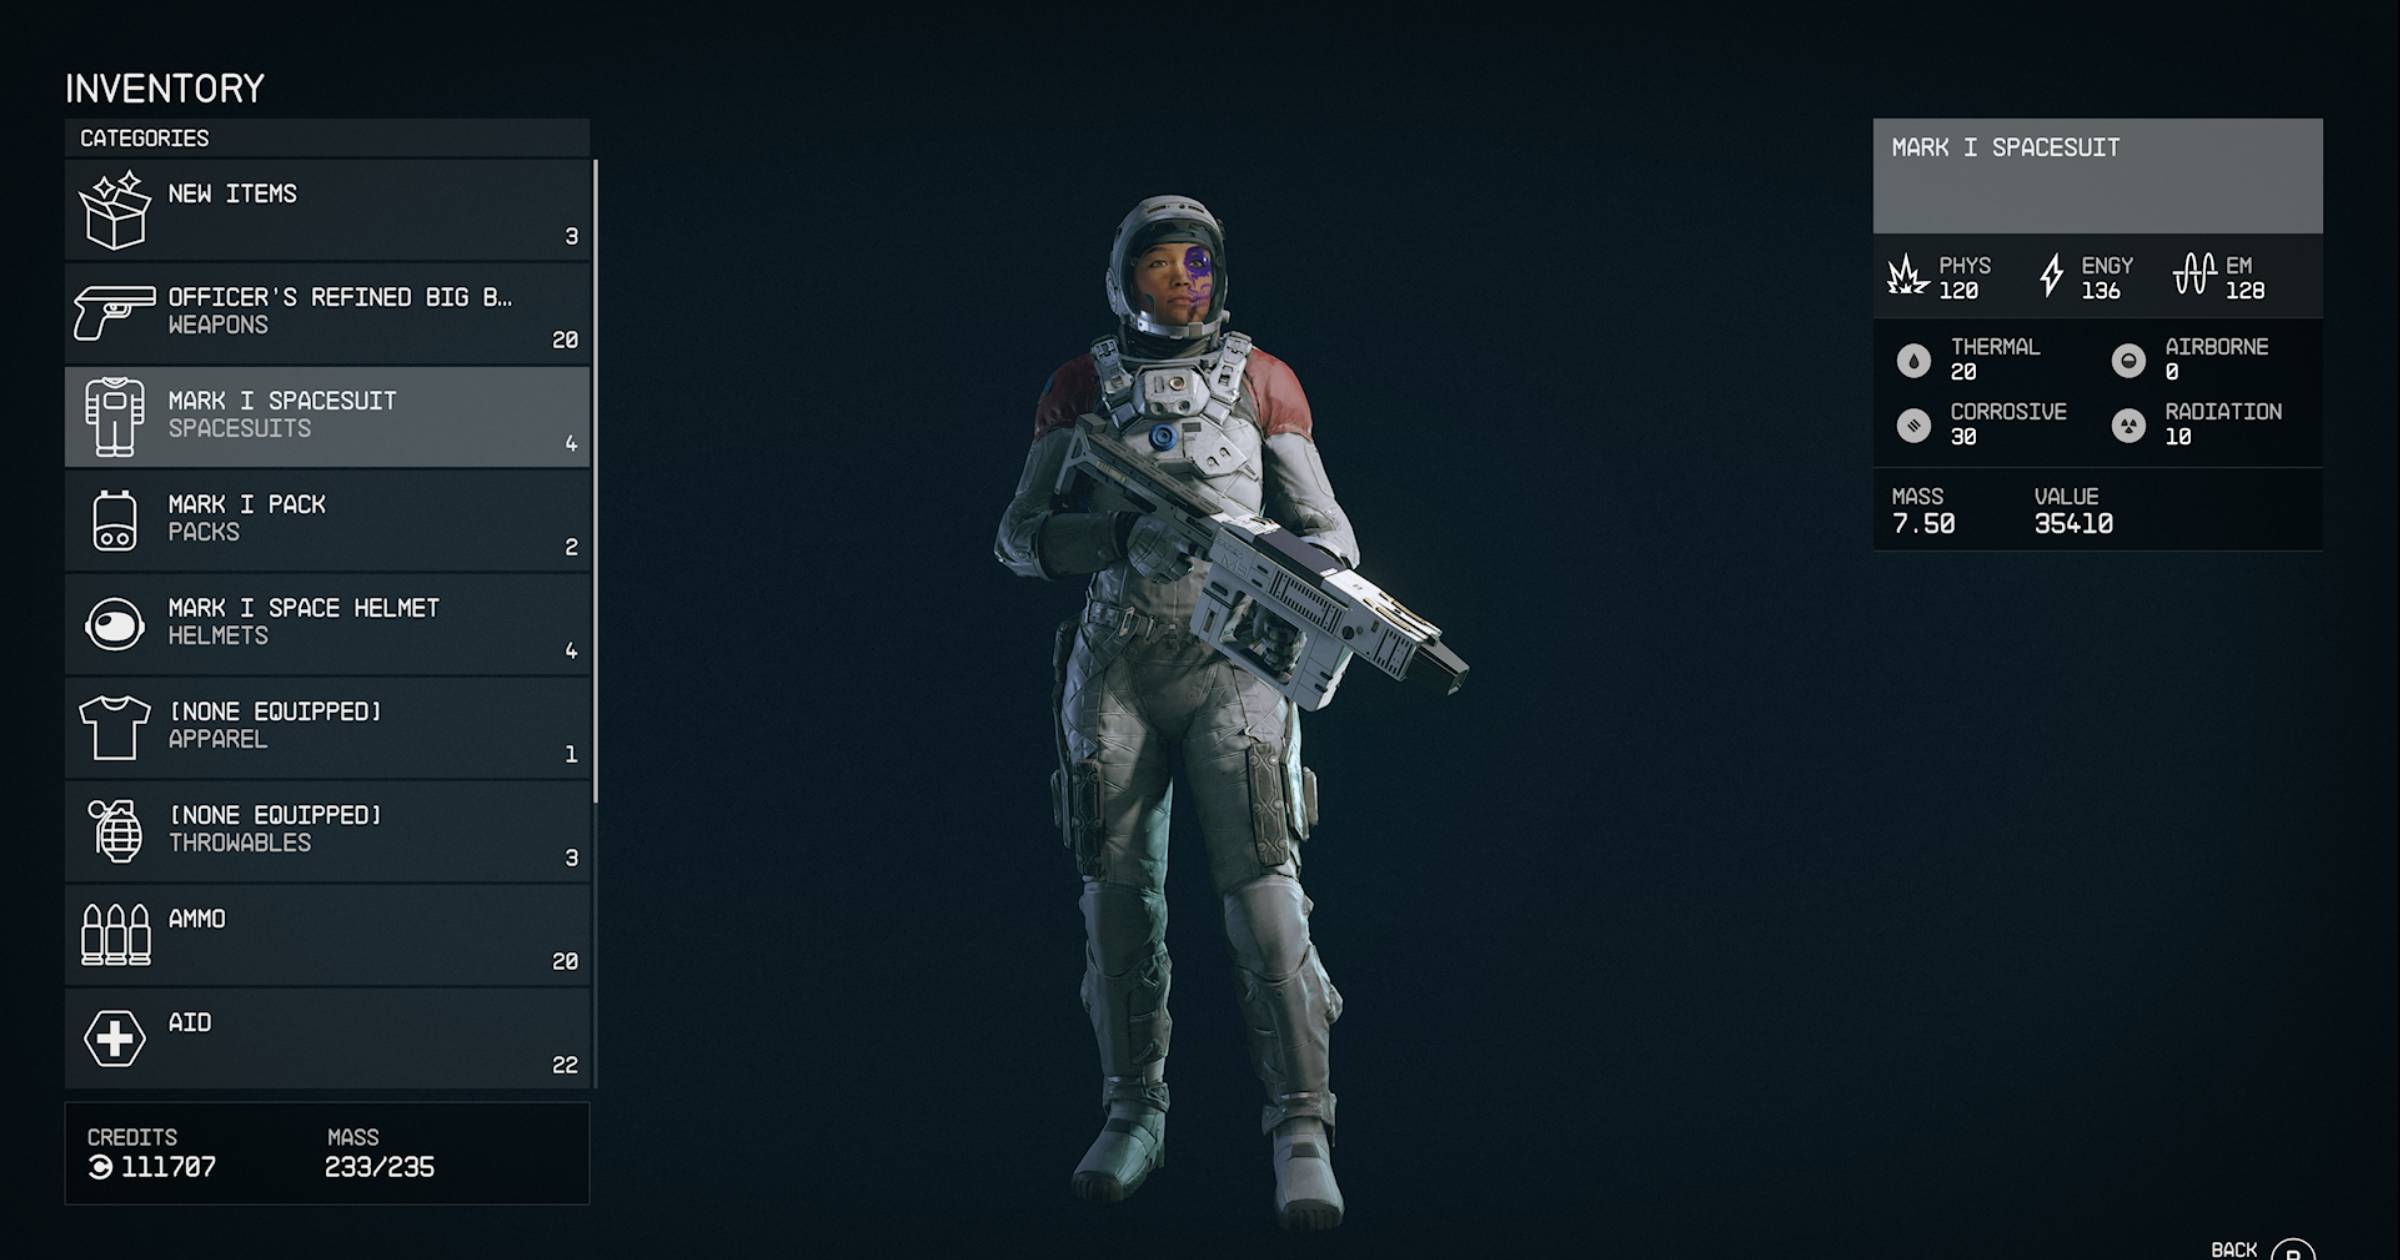
Step 1: Identify Your Armour Type
Before diving straight into upgrading your armour in Starfield, it’s crucial to know what you’re working with. Each armour type in Starfield has unique characteristics and upgrade paths. So, take a moment to inspect your gear, familiarize yourself with its current stats, and determine its category before wasting precious resources.
Be it a spacesuit, helmet, pack, or apparel, knowing your armour type will guide your upgrade decisions and ensure you’re optimizing for your gameplay style.
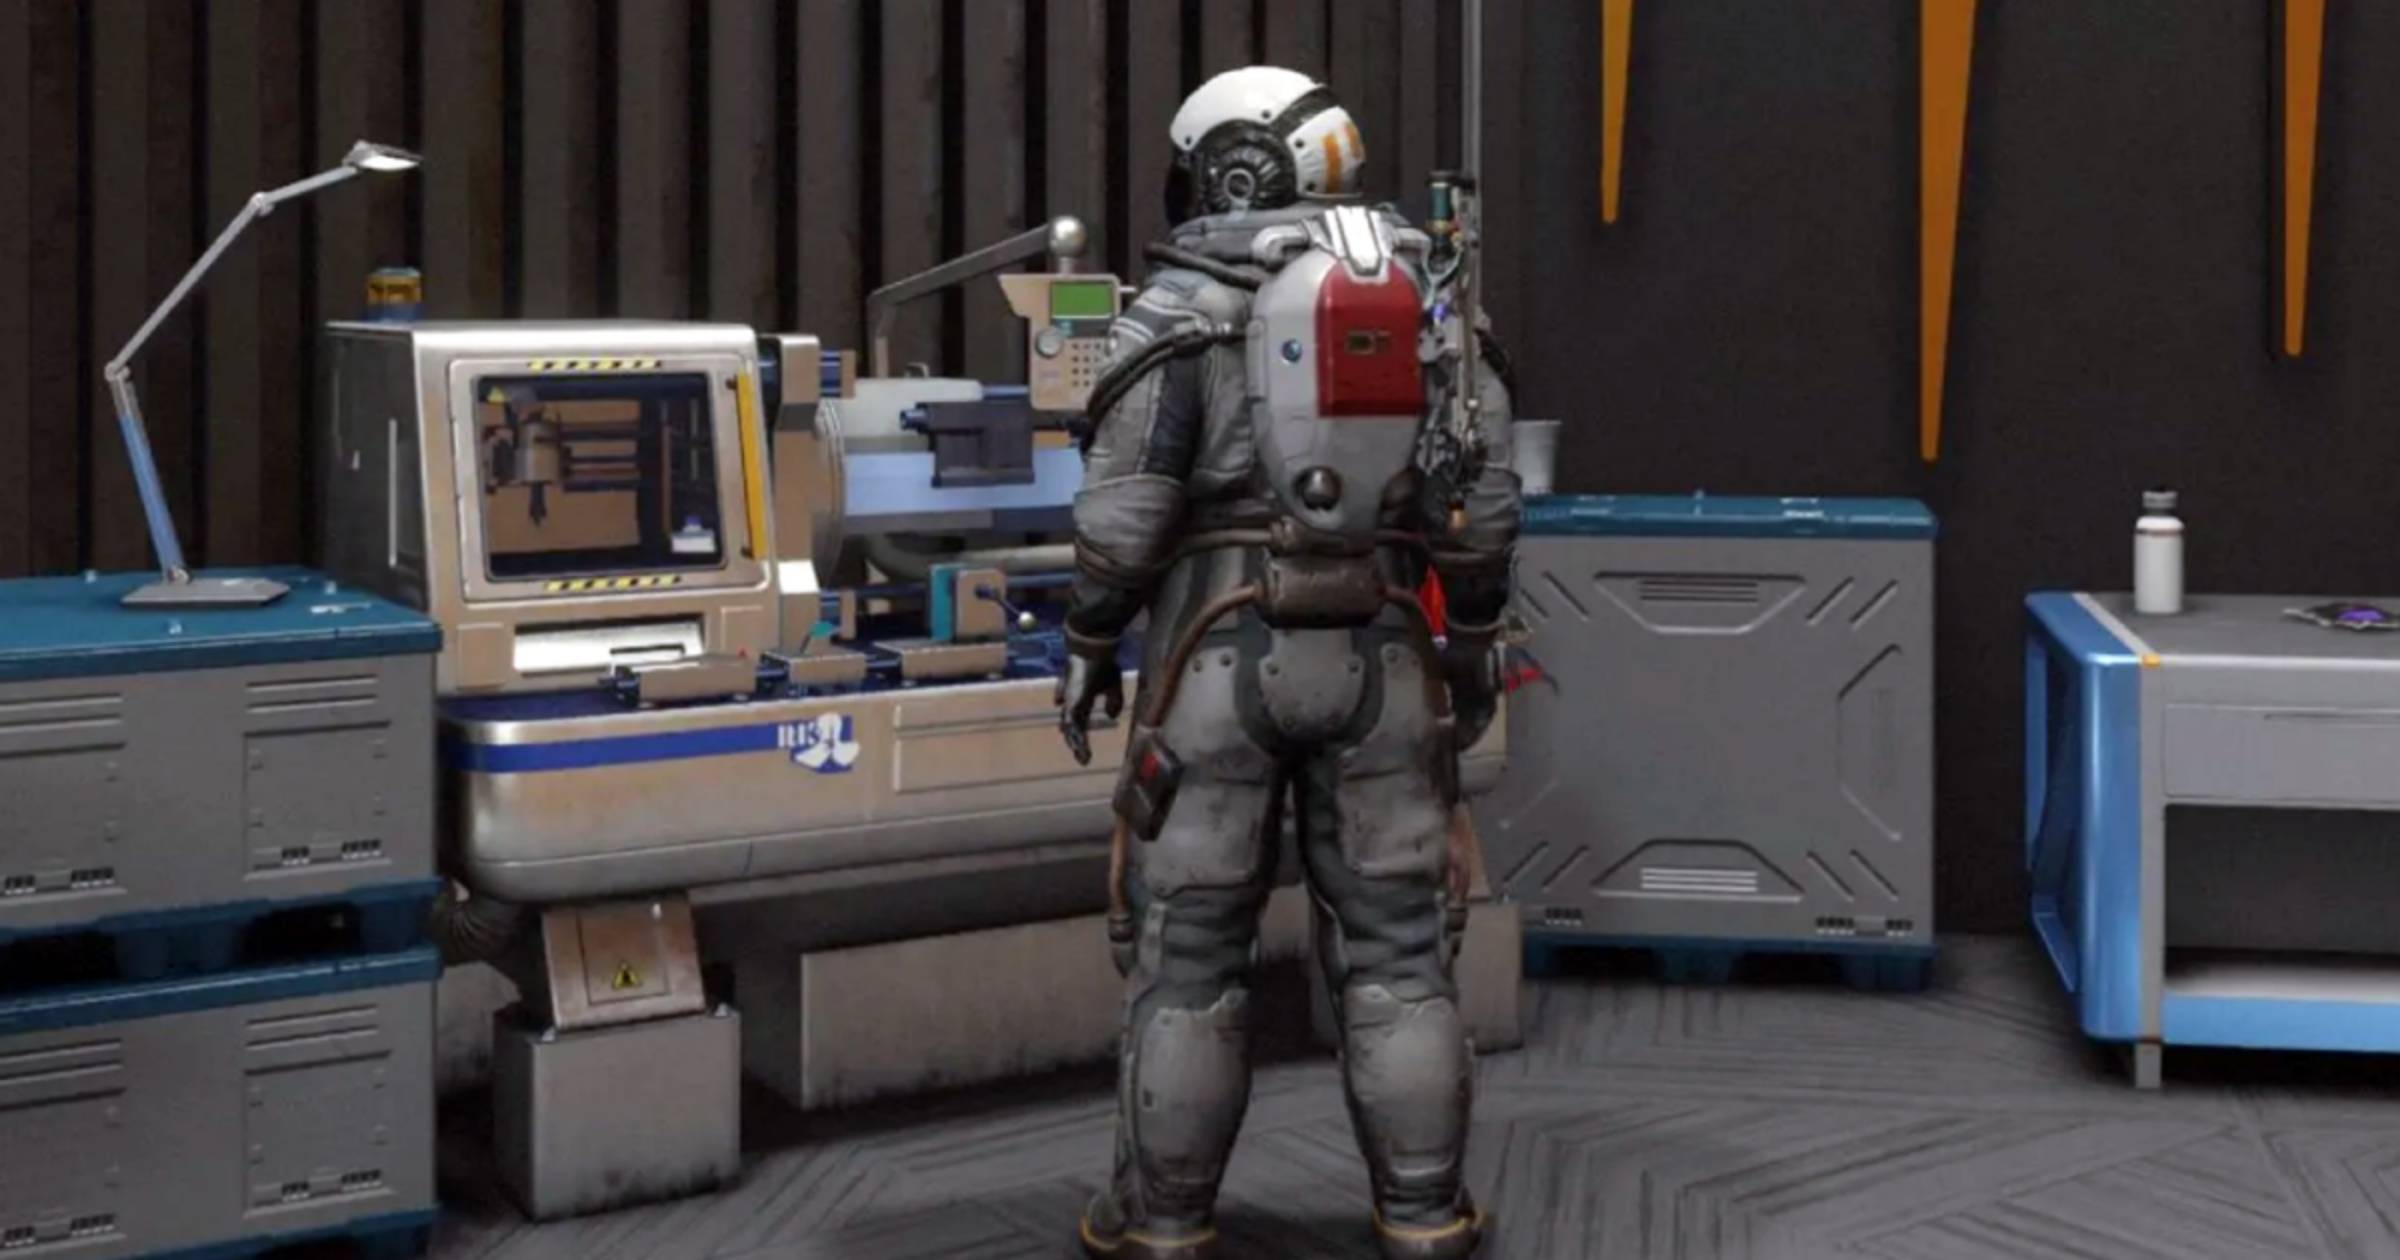
Step 2: Access the Right Workbench
The universe of Starfield is vast, and while there are many places to upgrade your gear, not all are created equal. Workbenches in Starfield are specialised stations where you can modify and enhance your equipment. Depending on your armour type, you’ll either need the Spacesuit Workbench or the Weapon Workbench.
The easiest place to get all of your upgrades done can be found at the Constellation Lodge. The Constellation Lodge is a hub that houses all crafting stations, making it a prime location for all your upgrade needs. However, you can also build a spacesuit workbench at your outpost or upgrade your ship with a workshop module.
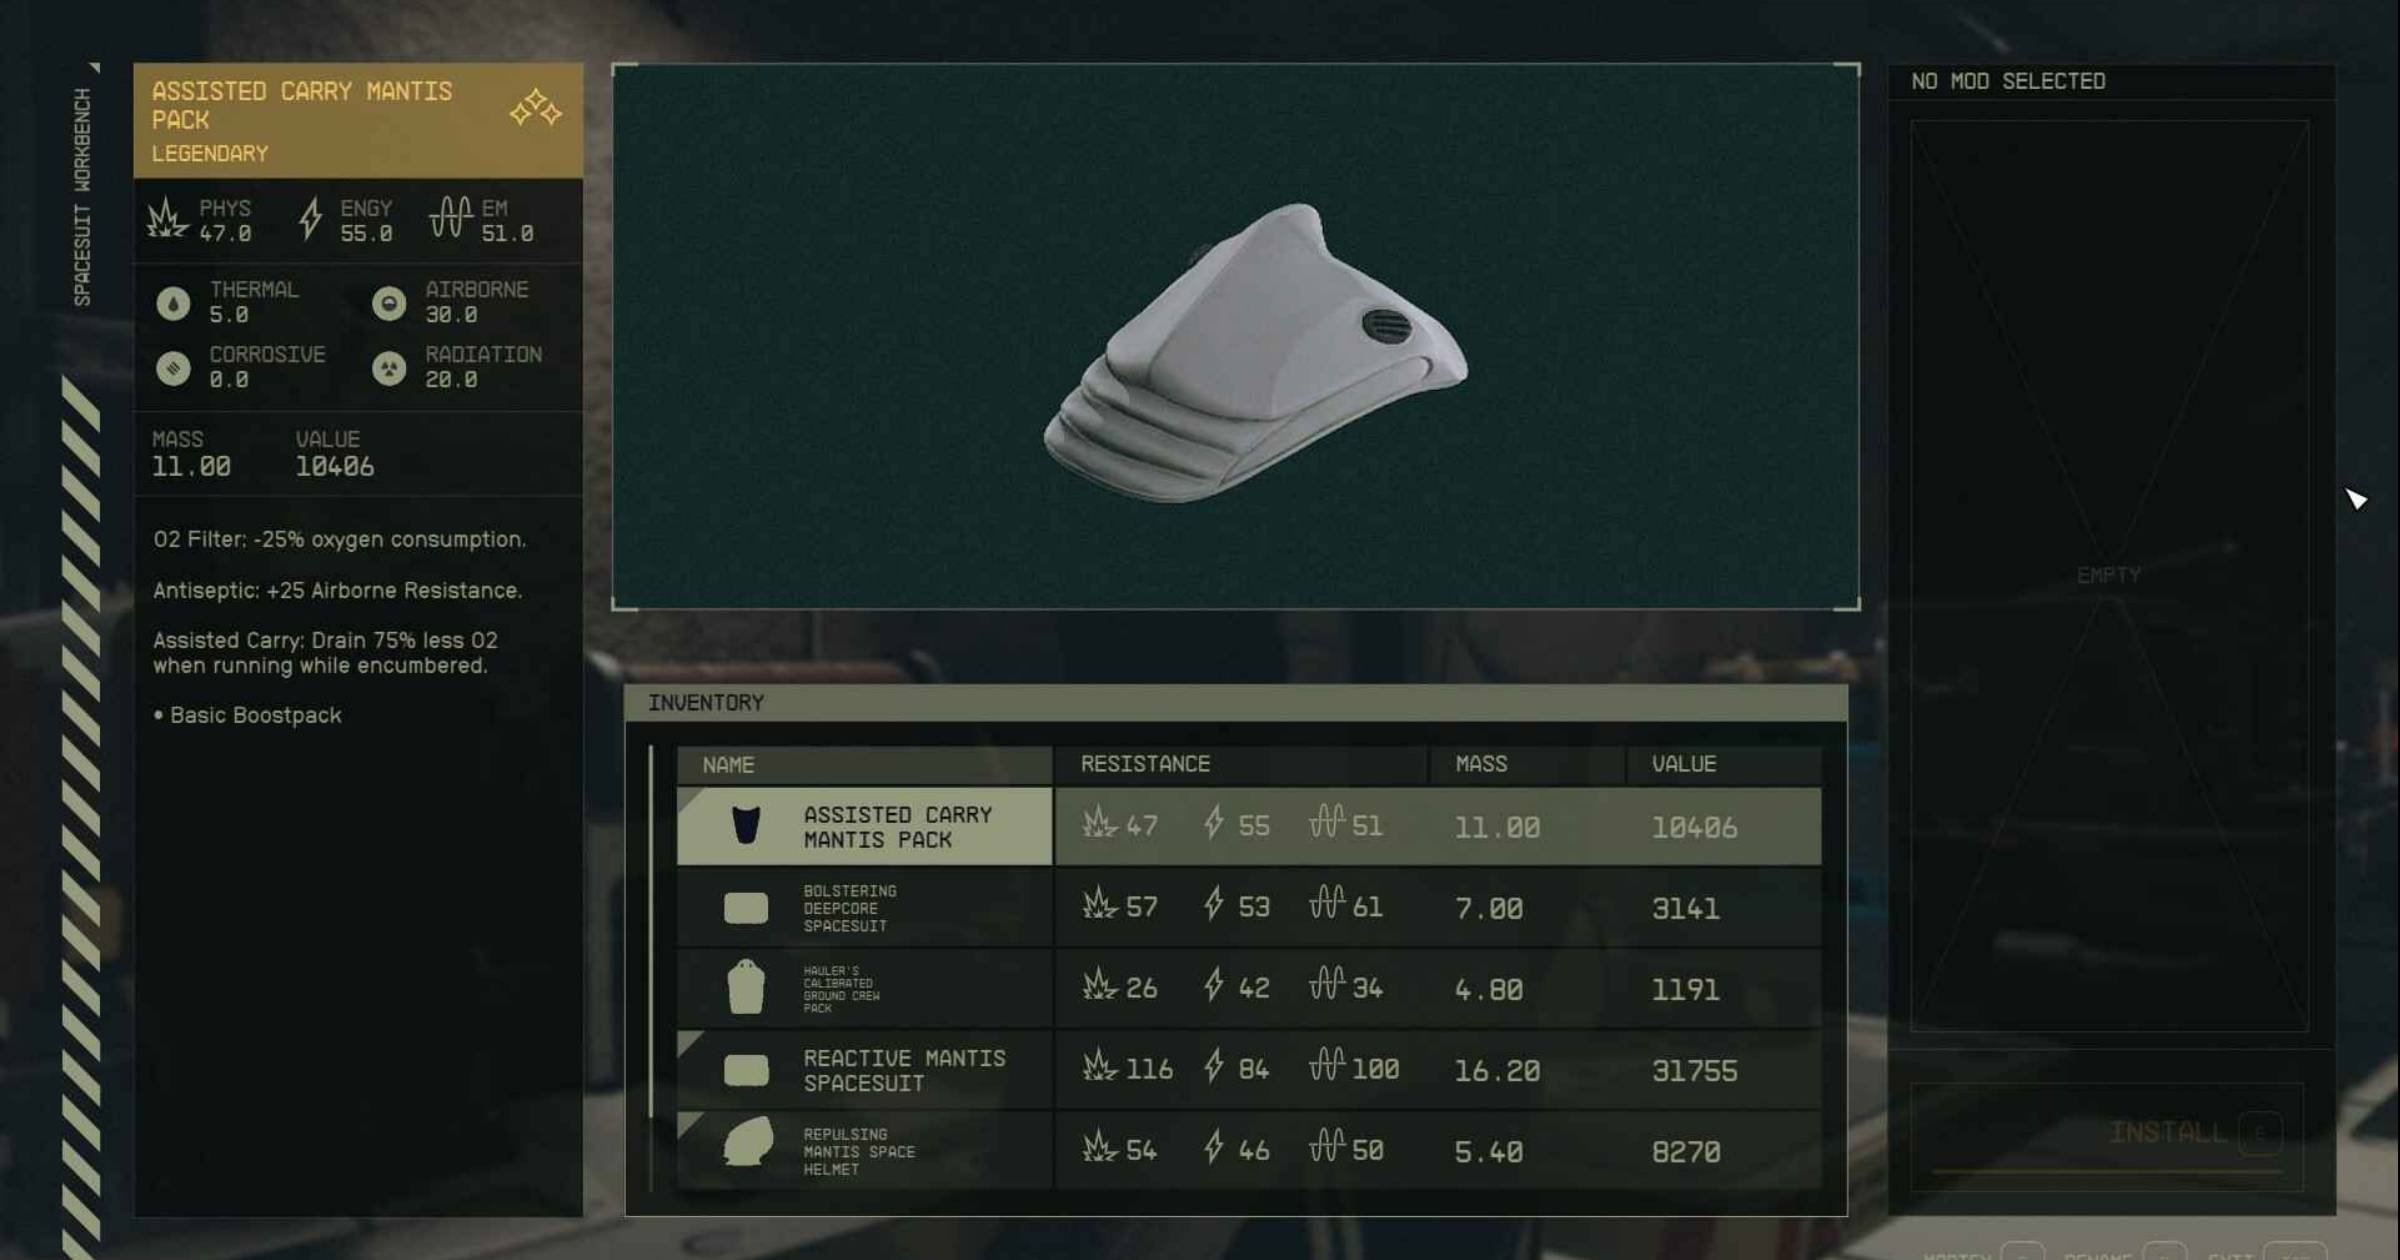
Step 3: Choose Your Armour Piece
Once at the workbench, you will have an interface displaying your inventory. Navigate through this interface to select the specific armour piece you wish to upgrade. It’s a good practice to prioritsze upgrading pieces that are most crucial to your current missions or playstyle.
Whilst Starfield has an abundance of resources, finding specific resources for certain upgrades can be somewhat challenging. So, be sure to only upgrade what you need and return back to the workbench when you have more resources for further upgrades.
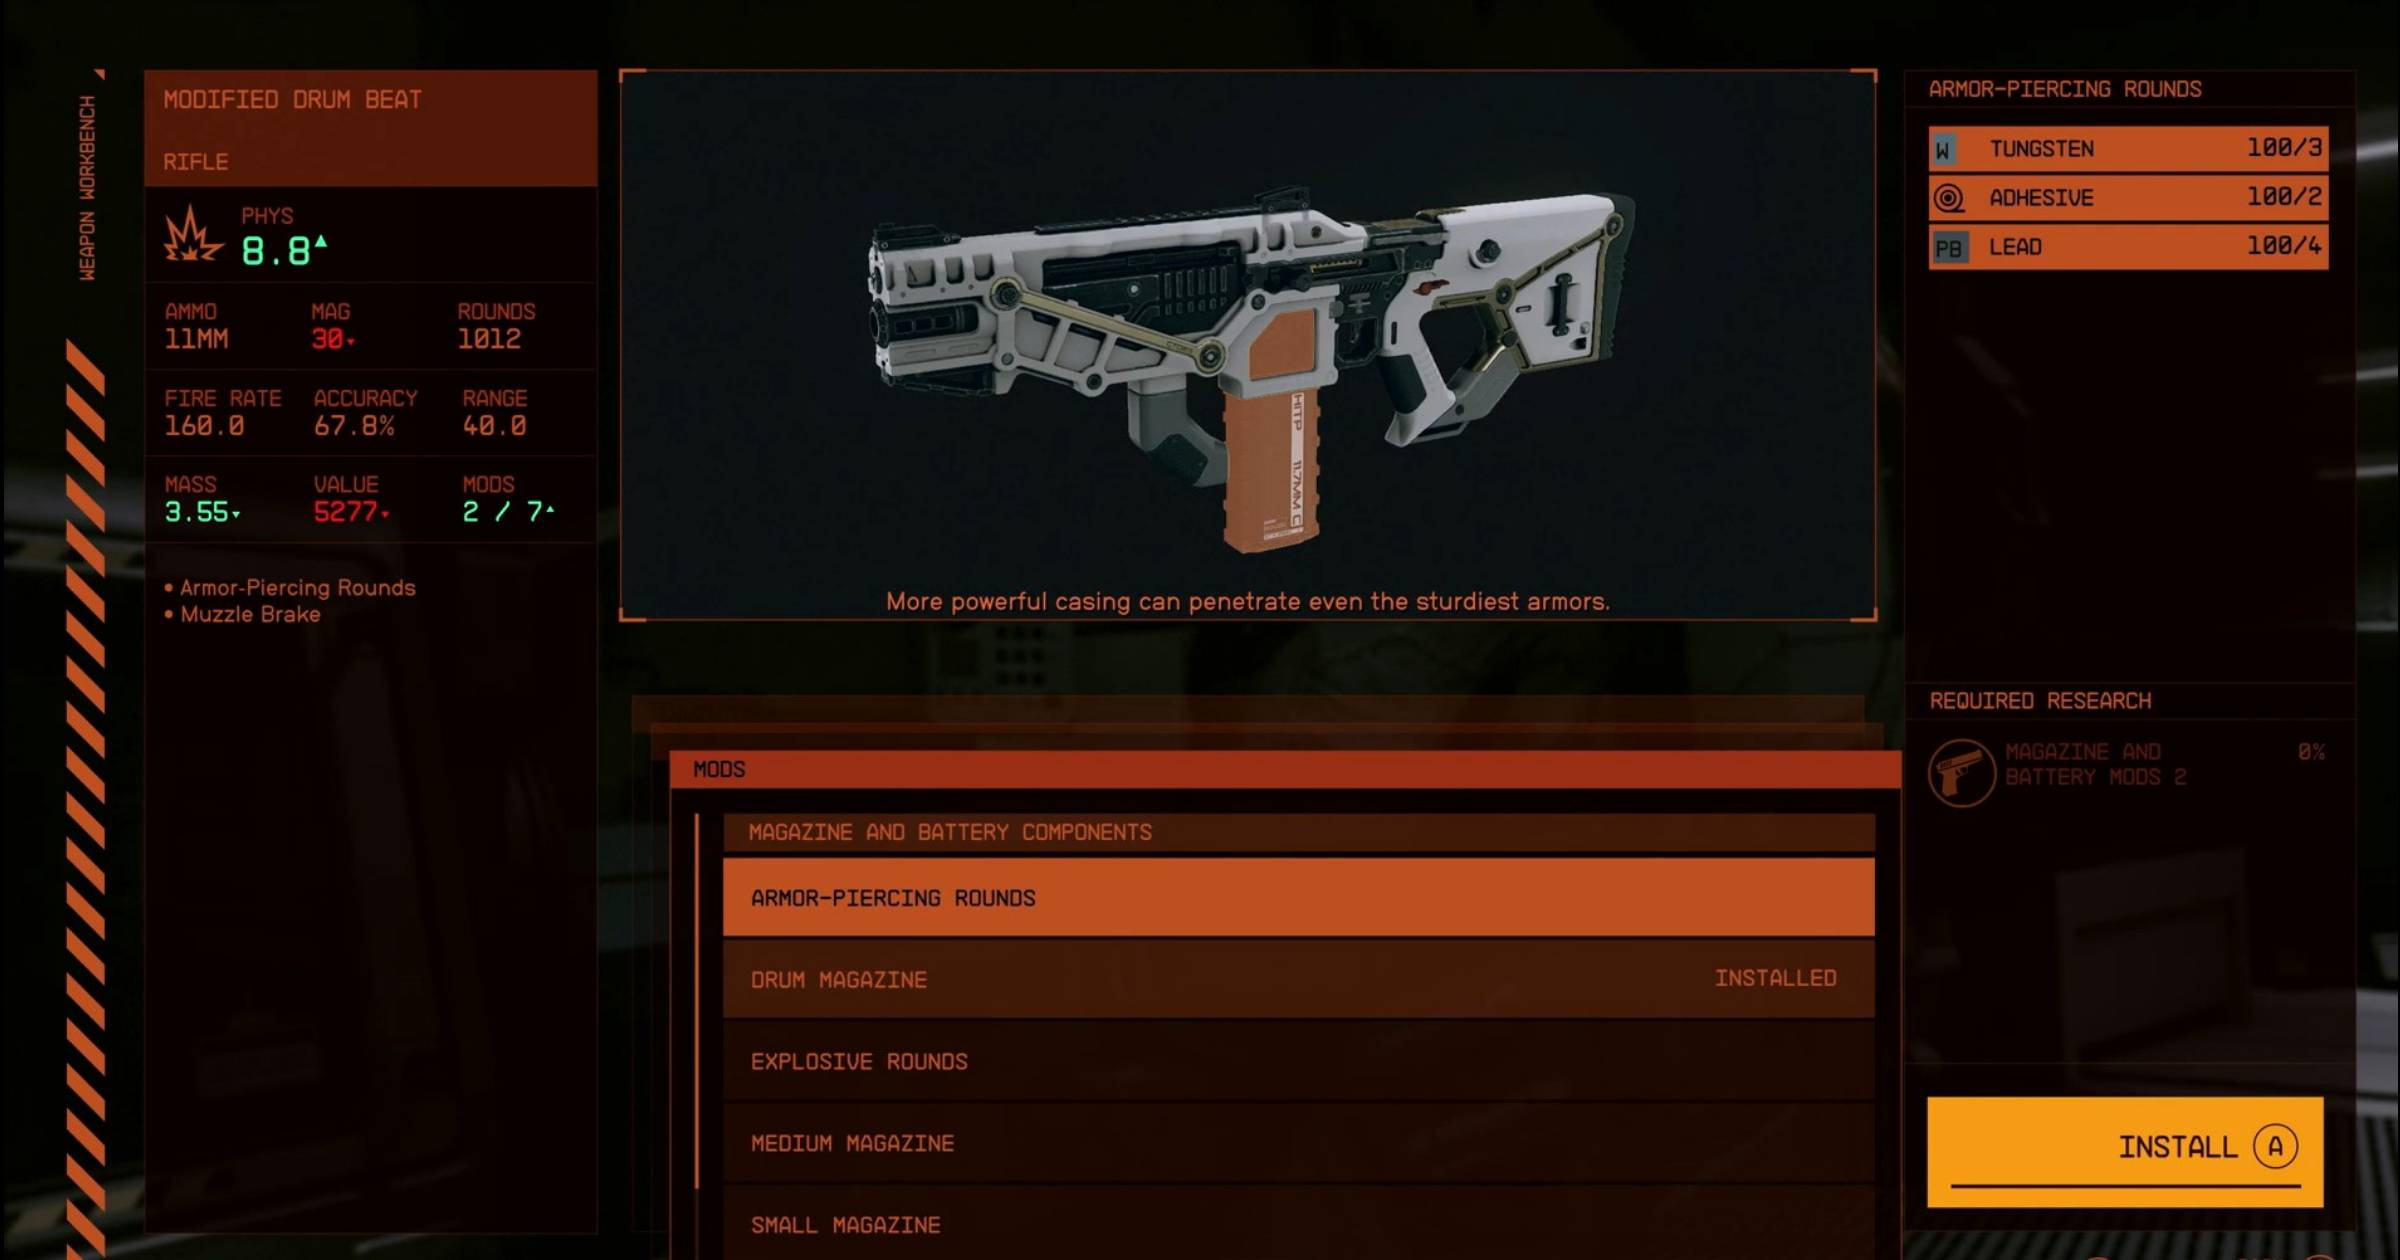
Step 4: Select the Mod Slot
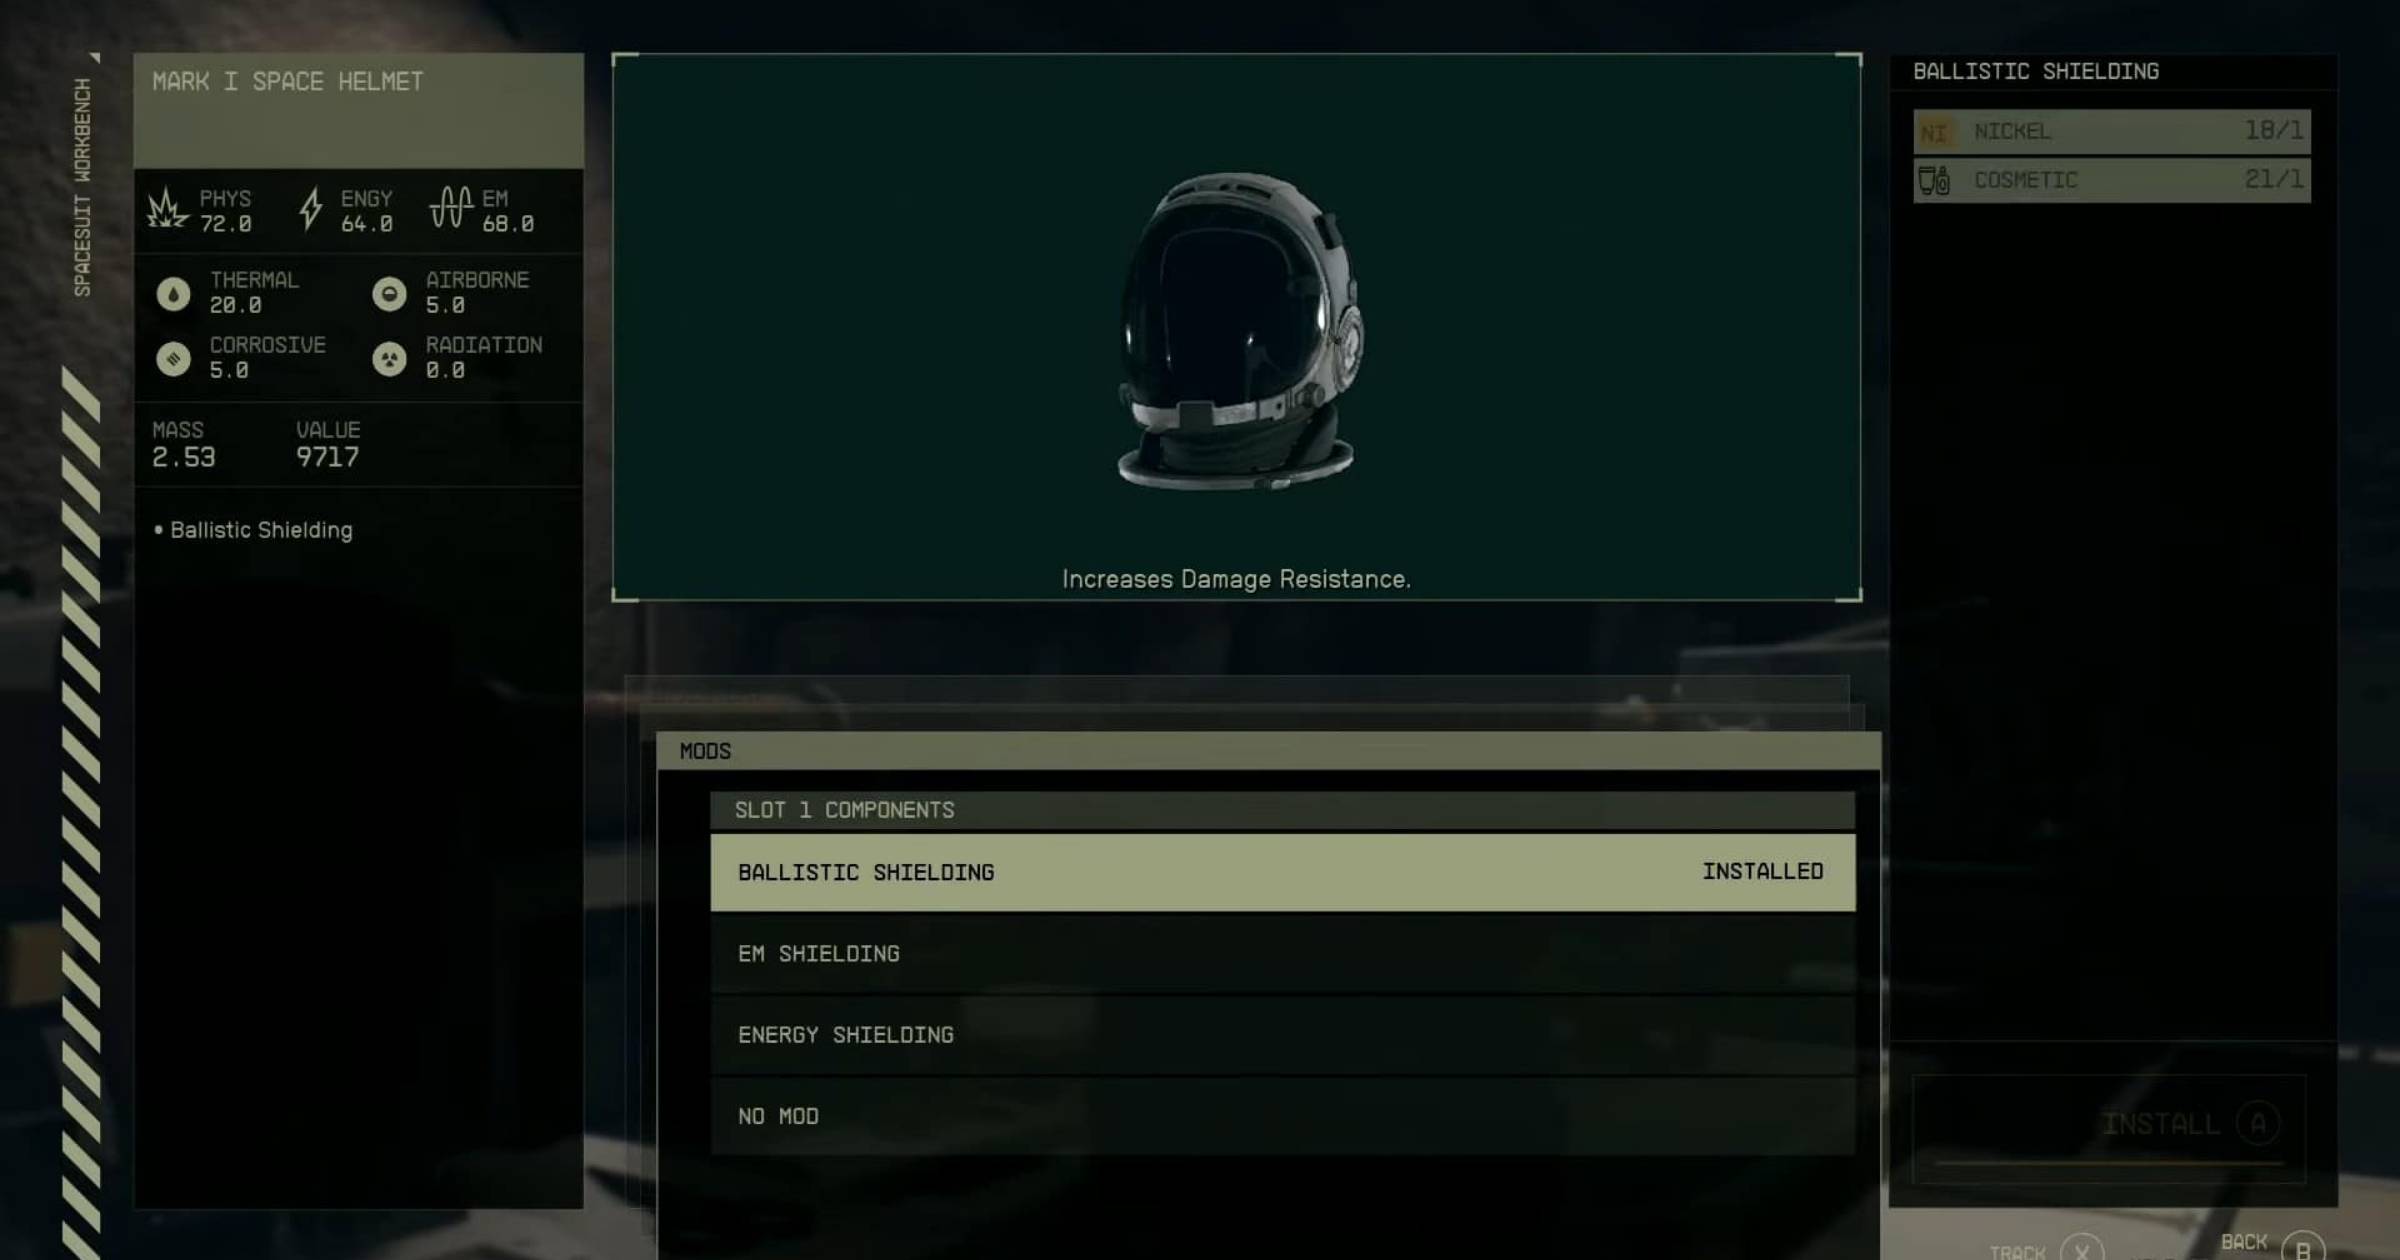
Armour in Starfield is modular, meaning you can customize different parts or “slots” Each armour piece has designated mod slots, which can drastically change its functionality and stats. For instance, a helmet might have slots for visor enhancements, oxygen supply, or communication boosters.
Once you have figured out what armour you want to upgrade, choose the slot that aligns with the upgrade you have in mind before proceeding to select your modification.
Step 5: Pick Your Modification
With a slot selected, you will now see a list of potential modifications available for that slot. Each mod comes with a description of its effects and the resources required for crafting. Take your time to read through these, weighing the benefits of each mod against its cost, the time it will take to collect the resources and how it fits into your overall strategy.
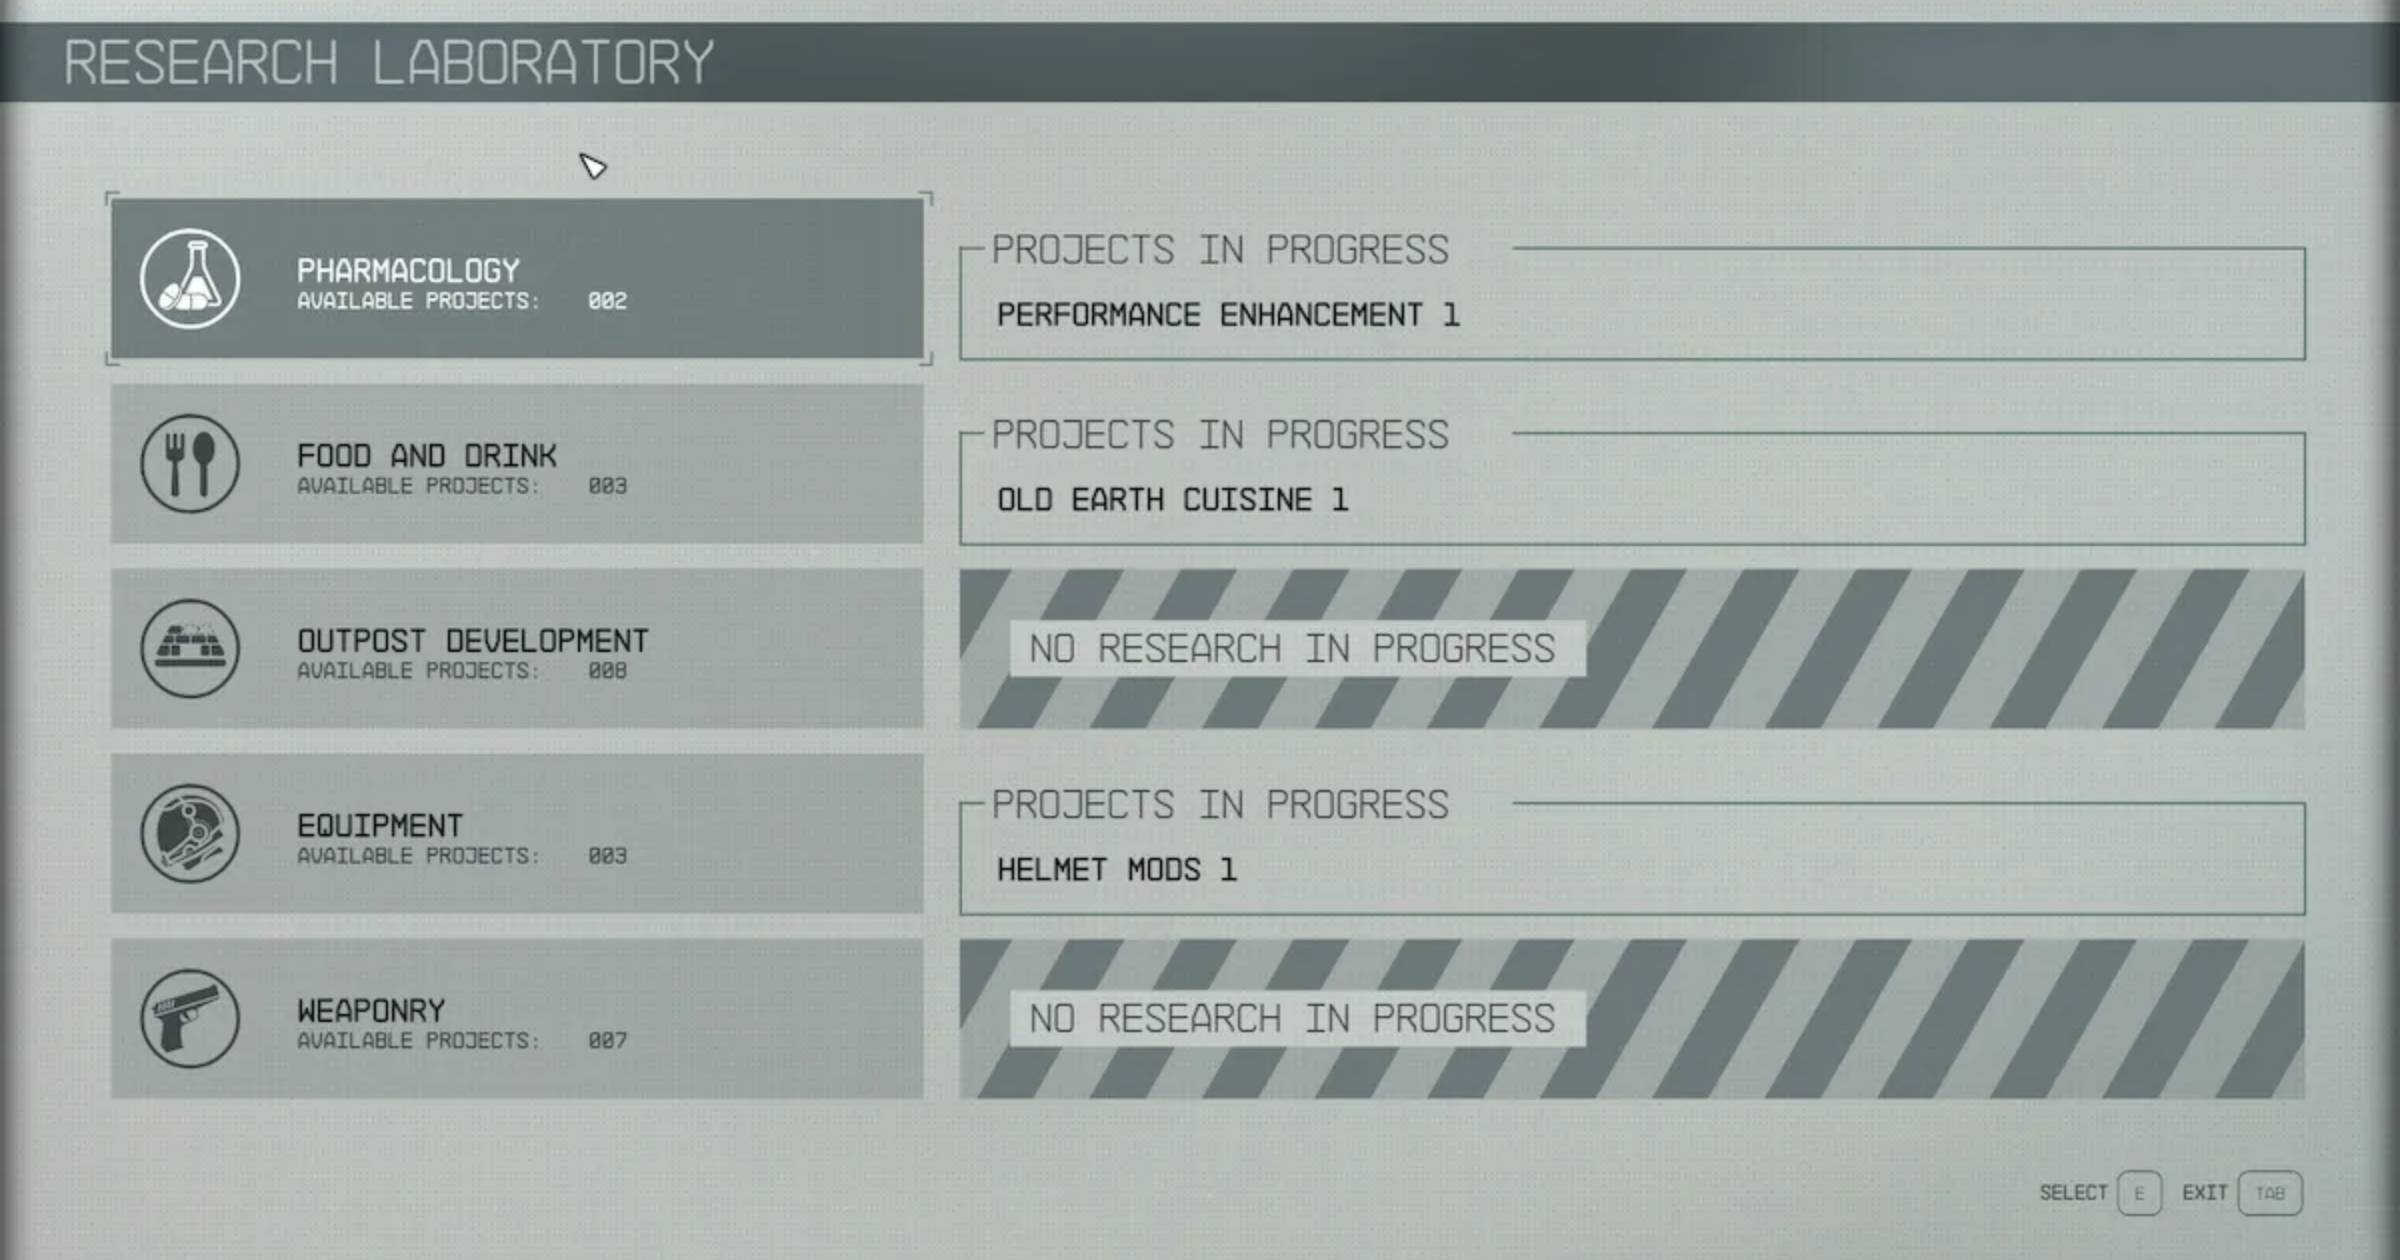
In addition, mods will require research prior to installation.
Due to the vast nature of Starfield, upgrading armour will take some time if you don’t plan your upgrades appropriately. So, be sure to read through tutorial guides online to take the most optimum route towards your desired outcome.
Step 6: Craft Your Modification
Once you have settled on a modification, it’s time to craft! Before doing this, ensure that you have the necessary resources, which can be gathered during your adventures or purchased from vendors.
In addition, if you have unlocked the required research and have the materials on hand, you can initiate the crafting process immediately. However, should you receive a warning, you may need to backtrack a little and research the mods first by visiting a research laboratory.
Once this is done, you can craft your modification and it will be immediately applied to your armour to enhance it’s capabilities.
Step 7: Allocate Skill Points (For High-Tier Upgrades)
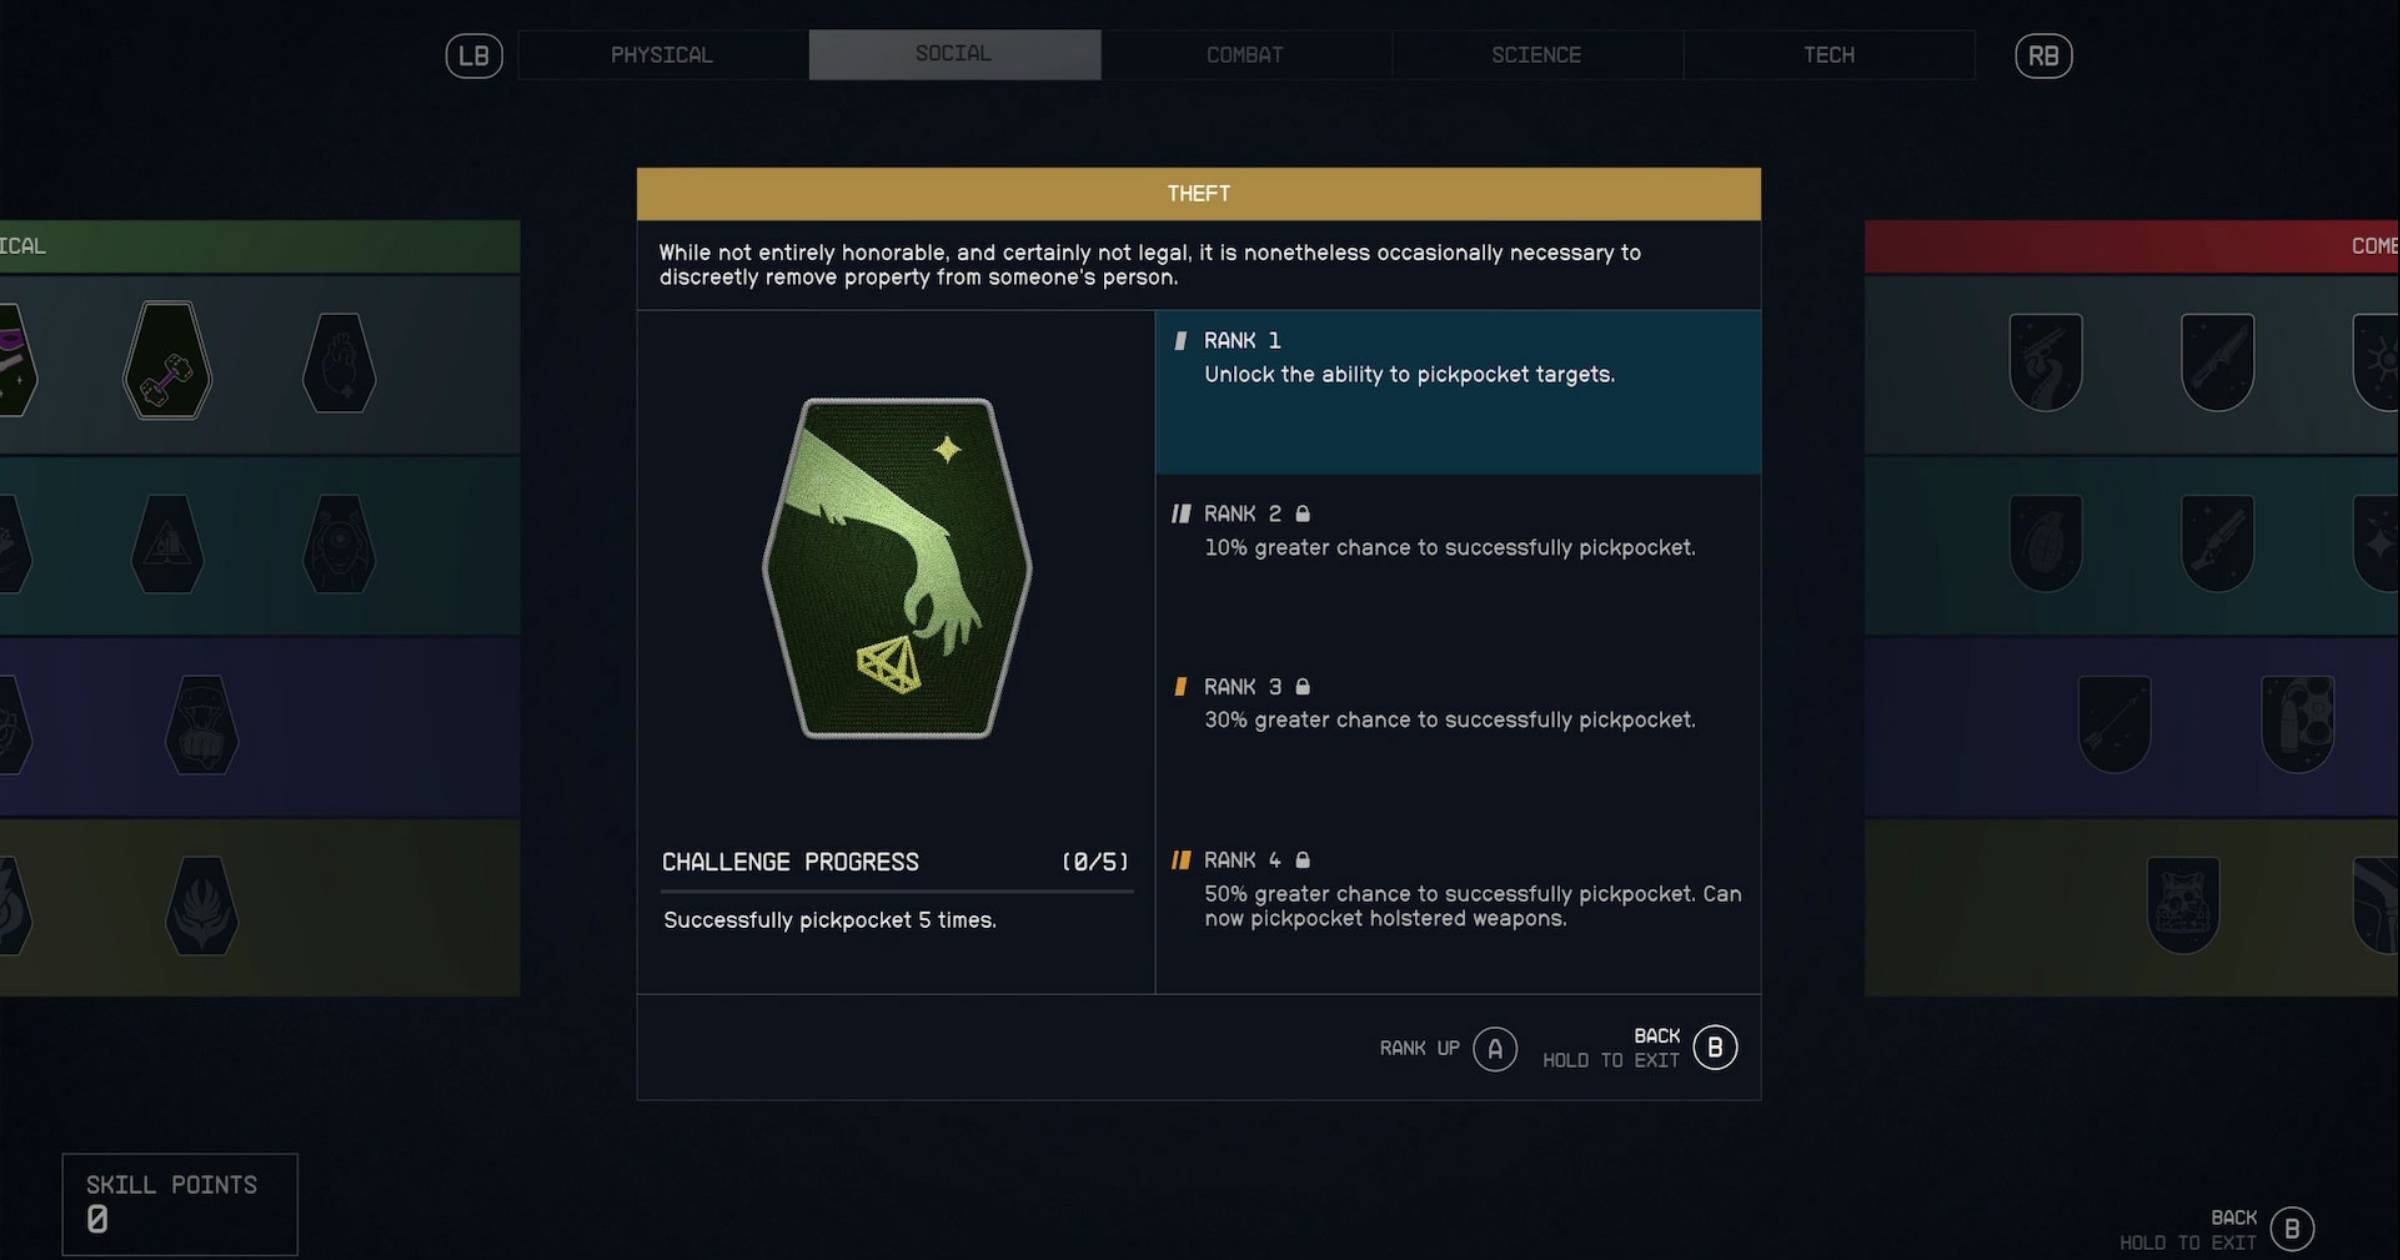
As a final step, it’s important to note that Starfield’s progression system allows players to allocate skill points to unlock advanced crafting and modification capabilities. If you’re aiming for high-tier upgrades, you’ll need to invest in specific skills like Spacesuit Design or Weapon Engineering.
These skills often come with challenges that, once completed, unlock new modding capabilities, allowing you to craft even more potent gear. There is only so much you can achieve with basic upgrades. So, be sure to spend the time completing the skill point challenges to modify your armour to the maximum.
Understanding Armour Types In Starfield
Now that you know how to upgrade your Starfield armour, it’s important to understand the different types of armour available. Armour serves as a player’s primary line of defence against the myriad of challenges that space exploration presents. However, armour in Starfield isn’t just about protection—it’s also about strategy, personalization, and adapting to the unique environments and adversaries you’ll encounter.
Below is a list of the individual Starfield Armor types and modification slots:
- Spacesuits
- Slot 1: Shielding
- Slot 2: Shielding or Reduced O2
- Slot 3: Shielding or Melee damage
- Slot 4: Reduce Noise or Weight
- Skin: Cosmetic
- Pack
- Slot 1: Capacity, protection, or oxygen.
- Slot 2: Healing bonus
- Boost Pack: The type of boost you want
- Skin: Cosmetic
- Helmet
- Slot 1: Shielding
- Slot 2: Shield or Detection
- Slot 3: Shielding
- Slot 4: Detection reduction
- Skin: Cosmetic
1. Spacesuits
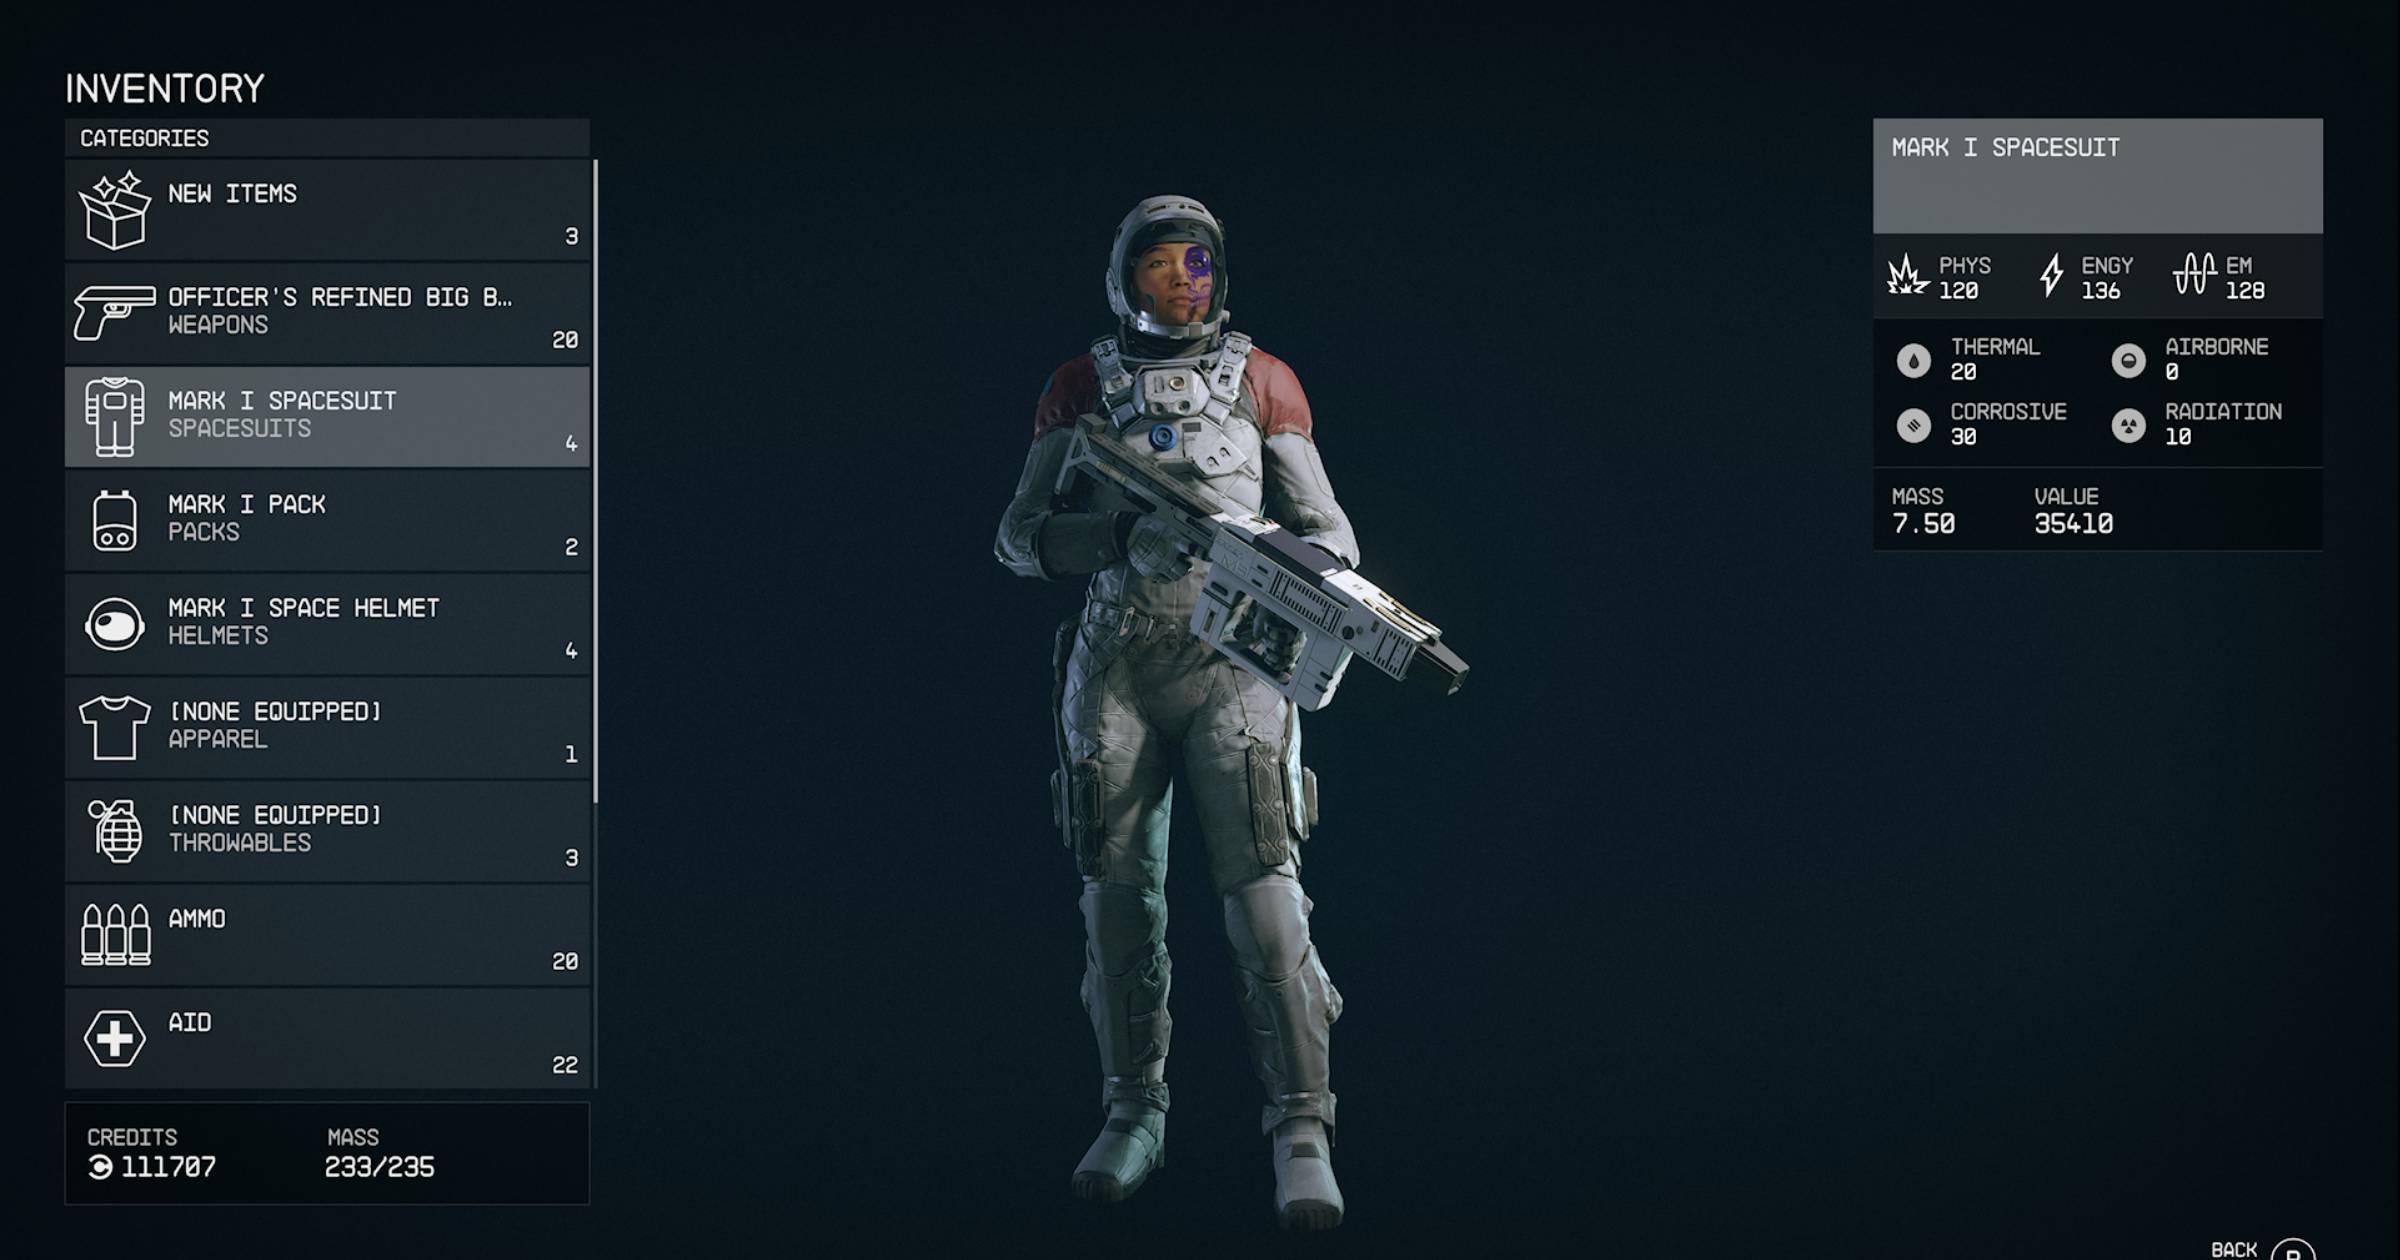
Spacesuits are the quintessential gear for any space explorer, however, they serve more than just surviving a vacuum of space. Providing mobility, functionality, adaptability and of course, a cool aesthetic, spacesuits in Starfield provide full-body coverage, eliminating the need for separate slots for chest, legs, or gloves, as seen in other RPGs.
This integrated design means that when you upgrade a spacesuit armour in Starfield, you’re enhancing your overall defence and its capabilities.
2. Packs
You should think of packs as the Swiss Army knives of space exploration. These jet-packs, worn on the back, are more than just mobility tools. They can be equipped with various tech upgrades, allowing for enhanced speed, manoeuvrability, or even specialized functions like scanning or resource collection. By upgrading your packs, you will quickly find that your exploration endeavours become a lot simpler; no matter the planet.
The right pack can mean the difference between a successful mission and a hasty retreat.
3. Helmets
In the hostile environments of space, a helmet does more than protect your head. It’s your primary source of oxygen, communication, and even a heads-up display (HUD) for navigation and data collection.
Helmets in Starfield come with their own unique stats, and upgrading them can lead to better visibility, extended oxygen supply, or enhanced communication capabilities.
Whilst many players only focus on upgrading their spacesuits, it’s important to consider upgrading your helmet frequently to yield these benefits throughout the game.
4. Apparel
Beneath the hard shell of spacesuits lies the soft layer of apparel.
Think of these as the undergarments of space—providing additional comfort, protection, and even some specialized functions. Whether it’s a suit that offers better thermal regulation or apparel that boosts your charisma during trade negotiations, the right choice can offer minor but crucial advantages.

Our Pro Tip
Upgrading armour in Starfield is more than just a mechanical process—it’s a strategic endeavour that can shape your journey through the cosmos. By understanding each step in detail, you ensure that you’re making informed decisions, optimizing your gear for the challenges ahead, and truly becoming a master explorer of the universe.
In fact, some of the best armour sets in Starfield are actually modifications of base armour that can be collected throughout the game.
As a lasting comment to this guide, we would recommend waiting until you acquire armour that has a strong statistical base before spending precious resources on upgrading. Once you upgrade your armour, there is no going back. So, it makes more sense to wait for a good set of armour in the first place before you go wasting resources.
Whatever spacesuit you choose to venture out into space, be sure that you scan the planet first to see whether your outfit will meet the minimum requirements so that you avoid a nasty and painful death.
Content Disclaimer: This step-by-step tutorial on how to upgrade armour in Starfield has been independently written. GamePro has completed more than 200 hours playing Starfield on Xbox and continues to refine his knowledge of the game. Bethesda has not commissioned GamePro to produce this guide.
Should you click on any advert and make a purchase, we may receive a small commission. But that’s just how we keep this website alive! Feel free to hit us up in the comments with any questions you have about Starfield!
